Posts Tagged ‘panel’

h1

Painting on Activa Clay Continued

February 20, 2024

This picture shows the Activa Supreme tile I made in the previous post that has now been mounted to a thin piece of plywood cut to the same size. This adds a little more weight to the tile, but not much, and has a better benefit of adding strength to resist cracking or damage. It’s now ready for painting, but before I get to that I wanted to test out another idea of creating a paint surface with this air-dry clay.

In this photo I’m painting thin coats of the clay onto a stretched sheet of paper. I’ve made a wet “slip” from the Activa clay by adding water to create a slurry that’s approximately 40% water. I do what I refer to as double coats much like how I apply traditional gesso, which is one thin coat in one direction that I let dry before adding another coat in the opposite direction. I repeat this nine times so that there are essentially eighteen thin coats on this sheet of paper.

Here is the finished surface with eighteen coats. It took about an hour to “paint” this slip in this manner. Ceramicists are familiar with clay slip for making repairs or adding decorations to their pottery, and this is roughly the same thing. There is also a way to make a thicker casting slip to pour into a mold, but it requires using deflocculants to keep the drying clay from cracking. I didn’t want to get into that. Painting the slip onto the paper in this way let me avoid any cracking issues. I could have painted this directly on a more firm surface rather than paper, but this slip is very wet and I’d likely have problems with that much water causing a board to warp and twist, which is not good for dried clay. In the photo above notice that I laid a piece of the tile sample on the corner, and that tile is slightly darker than the slip coated paper. Not sure why this is, since it’s the same material, and it’s opaque enough that the paper shouldn’t show through. Interesting.

Here I have removed the slip covered paper from the frame, and mounted it to a thin sheet of foamcore. This will give it the firmness I need without the extra weight of using plywood or hardboard. I will need to lightly sand this surface a little to smooth it out a bit, and then it will be ready for painting.

One of the issues I had comparing the tile I made with the Permastone or Wood putty casting material for painting is that this air-dry clay was more expensive by volume when made into an equal sized tile. However, using this slip method eliminates that problem. I estimate I only used about half a pound of clay to make enough slip to coat this sheet of 9 x 12″ paper. So, from that chunk of clay I should have enough to make 6 or 7 sheets at that size.

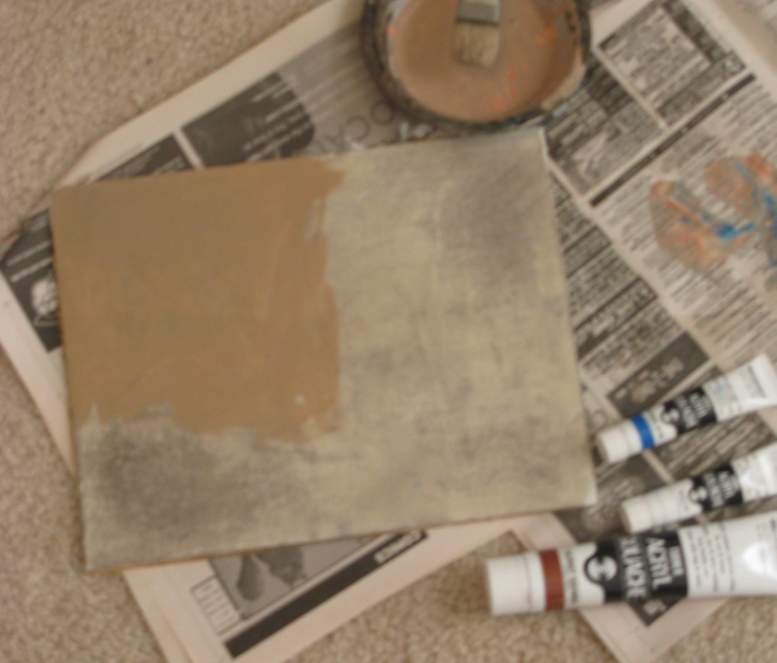
Finally ready now to do some painting on these, but first thing is to spend some time cleaning up the studio. It’s a mess in there.

h1

Painting on an Activa Supreme Tile

February 19, 2024

Following up on my previous post where I made a small tile out of Activa Supreme clay to use as a painting surface, I wanted to see how well paint would adhere to it. Before I get into that, I wanted to test out a couple things that I had read about it, and got some poor results, unfortunately. Information from the manufacturer said that the dried clay could be fired in a kiln. I don’t have one, but I figured an oven would work to at least help dry it out better. After only a few minutes in a hot oven the sample piece I made started to crack and blister. You can see the round explosions of moisture that erupted in the tile sample n the photo above. Maybe I should’ve let it air-dry longer, or used a lower heat (< 500.) The good news here is I don’t really have to fire or heat the tile to accomplish what I want with this material, but I did want to test this out. Another aspect I read was from watching a video demonstration of a sample piece of this being dropped onto a hard floor and not breaking. I tried the same thing on my wood floor, and you can see that it broke into several pieces. Not too surprising since I would expect the same thing from any piece of ceramic. As a result, I would recommend mounting the dry tile to a firm support like a wood panel, which I planned to do anyway. Glad I did all this on a sample piece.

Undeterred from these tests, I still wanted to see how well paint would adhere to the pieces that were left of my damaged sample. I painted a few swatches of color onto them using some homemade and commercial brands of gouache and casein paint. The paint went onto the tile very well. No beading up at all. The slight grey tone of the tile does cause the thinner layers of paint to have a more neutral appearance, but you could prime the surface with white first to brighten it up. Casein would work as a primer for gouache if you used a thin coat, and let it dry for a week or two. You can see a swatch of white on the large piece above. Acrylics had no difficulty on this. For oils, I would want to size the surface first with acrylic medium or shellac so that the paint wouldn’t sink in too much.

I’m pleased so far with how this is working, so next I’ll mount the small tile I made to a wood panel, and do a small painting on it. There’s one other test of an idea I have to see how I can make this material go further in an even thinner application, and I’ll show that in my next post.

h1

Activa Supreme Clay as a Paint Surface

February 18, 2024

Well I’m back after a bit of a hiatus, and thought I’d make a post about a new painting surface I’ve been testing out. This is a clay tile that I made using the Activa “Supreme” air-dry clay.

It arrived a couple days ago just like you see it on the right of the picture above, a chunk of clay shrink-wrapped in plastic with a mailing label slapped on it. I’m pleased that the plastic didn’t get torn, or else that would have dried out the clay, so not crazy about the packaging of it. Anyway, I sliced off about a 1/3rd of the 3.5 pound chunk, and used that to make my first test tile/panel.

I threw the section I sliced off for a few minutes down on the hardwood floor to compress the clay and soften it up some, which is a standard process to begin molding with clay. I then flattened it out a bit with my palm into a rectangular shape, and started rolling it out. I used two thin strips of cut plywood to get it to an even thickness while rolling, all the while flipping the slab over and working the back as well, rolling evenly in all directions including diagonally. My Work space was covered in an old Navy blanket to keep the clay from sticking to the floor, but it really wasn’t that sticky anyway. The final slab I have here is about 3-4MM thick and approximately 8 x 7 inches. I trimmed off the sides into a rectangle, and also made a thin slab of those trimmed pieces that I can use as a separate test piece. The Information for this says a 1/4″ piece can air-dry in about 24 hours. I estimate that from this chunk of clay I should be able to get roughly two 9 x 12″ tiles at this thickness with some left over.

This is how the tile looks after 24 hours. Still not completely dry. The room was kept to around 65-70 degrees at about 45% humidity, and it’s still a little moist, but somewhat dry around the edges, which are starting to curl a bit. It was still a little pliable, so I put some weight on it to lay it flat, and will let it continue to stiffen up for a few more hours. The smaller test piece is more completely dry. I think I’ll try heating it some in my oven to see if that helps dry it out better. The information says the this material can be kiln fired, which I don’t have, but that would make the tile even harder. It shouldn’t be necessary, however.

My goal here is to see how this clay compares to the casting material I’ve been using to make similar tile panels, such as the Permastone or Durham’s Wood Putty powders. In this form, the clay is a little more expensive by volume, but I have an idea to make it less so. I wouldn’t say it’s any more work than mixing up the casting powders, just a different process, and so far it takes longer to dry. I’ll start some tests on the sample piece I made, and post the results soon. All this looks promising so far.

h1

Gelatin Mold for Making Tiles

October 13, 2023

If you have been following my blog here for awhile you may have noticed that I often use homemade tiles of different plaster-like material as my surface for drawings and paintings. Traditional gesso is an ideal surface, but not without its inherent problematic quirks. As such, I’ve resorted to making thin tiles out of plaster mixes that do not require heat set or firing in a kiln. The two that I have used most often are made from either Durham’s Water Putty or Activa Permastone. These are powders that you mix with water that dry quickly into a hard surface. The water putty is nice, but yellow tinted due to the wood content, Permastone is white, but a bit more expensive.

The simplest mold I’ve made is just a thin wood frame placed on a sheet of glass that I pour the plaster into. This works okay, but I wanted to try and make a more complete mold with a bottom and sides. Silicone would work great, but I happened to have this gelatin material on hand for a different project. It’s an alginate gel powder from Alja-Safe called “Smooth-On.” When dry it forms a rubbery gelatin similar to silicone, but not quite as sturdy. I thought I’d give it a try to make a mold for casting my tiles. The above images show the steps I followed in a recent attempt that worked well.

First I mixed up the alginate in a 1:1 part ratio of water per instructions. As a mold for my gel I wanted to recreate a tile the same dimensions as a 9×12″ piece of plywood that was 1/4″ thick. I also happened to have an old picture frame that was slightly larger than that, 16×13″. I placed the plywood panel on a sheet of glass using some double-sided tape to hold it in place, and centered that in the frame. I then poured the alginate over the plywood and brushed it out to the edges of the frame, gave the glass a little shake to level it out, and waited about 30 minutes for the gel to set. When I removed the dried gel from the frame I had a nice complete mold for my tile.

I now was ready to mix up my tile using Permastone. Their instructions recommend a mix of 1.5 to 1, but I found that was too wet, so I used 1.5 cup powder to 1/2 cup water measure that gave me just enough to fill my mold to the top for a 1/4″ tile. I poured the mixture into the mold, shook the glass a little to level it out, and waited about 2 hours for it to dry. The dried tile was easy to remove, but needs a little cleaning up along the edges. The mold certainly is not going to last very long. I can already see a little tear along the edge even though I was careful removing the tile. Still, I think I can get 1 or 2 more tiles from it. I’ll likely invest in some silicone for a stronger mold, but this shows a good proof of concept that I can get a workable tile using this process.

h1

Wood Support for Water Putty Panel

June 11, 2023

I wanted to attach a firm wood panel to the back of my recently completed painting that’s on a dried plate of wood putty. This plate, while reasonably strong, could still get damaged or chipped from handling, so the plywood will reinforce it and make it stronger. I found some maple sheets of plywood online from Columbia Forest Products that are 1/4″ by 12×19″ in a box of 10 for $50. My painting is 8.5 x 11.5, so I cut the plywood on my tablesaw to fit. I used an acrylic gel medium I had on hand to adhere the plate to the plywood. Different wood glues could have worked, but since the plate was a little bumpy on the back and of uneven thickness I figured the gel would help fill the gaps, The gel dried hard after a few hours.

h1

Painting Final: Portrait of Jason

April 22, 2023

Finished the new painting of my friend, Jason. This is in casein, 8×10″ on a water putty tile panel. I used several of my own mixed casein paints on this, and they worked well.

h1

New Painting Started: Portrait of Jason

April 21, 2023

Starting to work on a new painting so I can use some of the paints I’ve been making. This is a portrait of a former coworker named Jason, based on a photo I took of him many years ago. The panel is a tile I made out of Durham’s Water Putty that I written about before. This tile panel is 8×10″, and I’ve coated it with a thin wash of raw umber casein. I made an outline drawing of the photo and rubbed some white chalk on the back so I could transfer that to the panel. Now he’s ready to be painted which I will show in the next post.

h1

New Painting Started: Gina Applies Mascara

September 6, 2021

I’m painting again. Started working on this today. It’s based on an old photo of mine of a friend, Gina, applying mascara as she looks in a mirror. The surface is a 9×12″ piece of white ABS plastic. I first made a line drawing of the photo to scale, and then transferred that to the panel. The paint is gouache, using raw sienna with a bit of yellow. I have a couple different ideas of where to go from here, and will probably merge them together somehow.

h1

Making a Water Putty Panel for Painting

August 24, 2020

I have used Durham’s Water Putty before as a drawing surface where I painted a couple thin coats on a wood panel, similar to making a gesso panel. This time I wanted to try to make a solid tile panel out of the putty using a rectangular mold made of flour dough.

If you’re familiar with “Play-Doh” this mold material made with flour handles the same way. The recipe is simple:
1 cup flour, 1/4 cup salt, 2 teaspoons cream of tartar, 1 cup water, 1 tablespoon vegetable oil (canola or coconut)
Combine the dry material into a large bowl. Combine the oil and water, sprinkle a little of the flour mixture in it so it mixes better, and then stir it. Slowly add this to the flour mix while stirring.
Heat this on the stove: spray some oil into a large pot, and place your flour mixture inside it. Stir continuously for a few minutes until it all comes together into a ball. Remove it from the bowl and let it cool to room temperature. Store in a plastic bag, and it should last several months in a cool dry place. This makes about twice as much as I’ll need for my mold, but that’s also reusable.

To make my mold, I roll a small handful into a long tube shape that matches the edge of a picture frame used as a guide. The tube is about 1 inch thick. I then cut it in half lengthwise for both sides of the mold, and roll out another tube. On a large sheet of glass I place the pieces around the frame creating a rectangle shape. I make sure to press down some on the top of it to be sure there’s no gap between the glass and the dough.

Now I mix together the putty powder and water. The instructions recommend a 3:1 ratio, but I found that too thick to pour, so this mixture is a little wetter. This amount makes just enough for a 9×12″ (23x30cm) tile panel about 1/4″ (5mm) thick:
20 ounces putty powder, 8 ounces water
Add the powder to the water slowly while gently stirring to reduce the amount of bubbles. Ultimately bubbles won’t matter as you’ll see later, but the fewer the better.

I pour the putty mixture into the rectangle mold. Using a plastic spatula in small circular motions I gently push the mixture to the edges of the mold, being sure to fill the corners.

I slide the glass partially off the table to grab the glass and begin to shake it side to side, back and forth. This causes the putty to level out smoothly. I took a metal pin and popped some of the larger air bubbles to help make this surface as smooth as it will get on its own.

Anyone who does plaster casting will likely look at this and sadly laugh at all the bubbles, but in this case it won’t matter. That’s because you’re looking at the back of the panel. As the air bubbles rise inside the putty, the liquid fills the void underneath. Since the front is sitting on the glass, when I flip it over it will be extremely smooth and bubble free.

After it’s been sitting to dry for about an hour, I carefully test the edges to remove the dough mold. It comes off very easily without damaging the tile. After about two hours drying it’s soft enough to let me lightly shave the edge where it rose up the side of the dough mold. I later plan on gluing this to a wood board, so I need this as flat as possible.

After four hours of drying the panel is sturdy enough to remove from the glass. This is where plastic actually works better than glass, but unfortunately I didn’t have a plastic sheet handy that was large enough. With plastic I can slide it over the edge of the table, and gently bend it back away from the tile. I can’t do that with glass, so I take a knife blade and carefully work it under the tile. There are “release” sprays that model makers use for this purpose, but I didn’t want that on the surface of the tile.

The tile is dry enough now after four hours to safely begin painting, but I’m going to give it a few more hours anyway. A little sanding will straighten up those edges. You can score the tile with a knife when it’s still partially dry (about two hours or so) if you make the tile slightly larger, and that can give you a cleaner edge. If the surface feels too smooth to you for painting, you can sand it a bit with a fine grit paper. If you use a hardboard panel instead of glass or plastic, it will give a slightly rougher surface like paper, but the water will eventually cause you to discard that damaged wood panel. You’ll notice that this tile has a slight yellow cast to it, and some areas have dark spots and stains. It’s the nature of this material. That’s not a problem when you start painting over it, but it’s something to take into account. All paint media works well on this surface, but it is very absorbent, so oil might need a protective barrier of either thin acrylic or shellac. Gouache and casein paint work very well on this. This tile is stronger than plaster of paris, but it will still easily break if hit or dropped, so be careful. For that reason, gluing it to a firm support is wise.

I’ll work up something soon as a painting subject using this surface, and then post the results.

REFERENCES:
Homemade Play-Doh

Durham’s Water Putty

h1

Polyester Fabric Mounted to Hardboard

November 30, 2017

I’m preparing to start another painting, and wanted to use some polyester fabric I had. First I needed to mount it to a hardboard panel.

This shows a 16 x 20 inch panel with the fabric glued to the front. To get to this point I had to prepare the panel first. It was a scratch panel I had in the studio that had a few thin spots of white paint I needed to sand down. I used some acrylic “gouache” paint I had and mixed it with some GAC-100 medium to both prime and size the panel. I thinned this a bit with water to make it more brushable, and covered the panel in two coats.

I roughly cut a sheet of the fabric about 2 inches larger than the panel. It had a few creases in it, so I used an iron set to low heat to smooth them out. Once the paint had dried to the touch, I covered that with some Liquitex Extender Gel to use as an adhesive for the fabric. This also had to be thinned a little. I dropped the fabric on the wet panel, and used a brayer to roll the fabric smooth. I left this sitting under some weight for a few hours to keep the panel straight as it dried. Later I’ll glue the edges to the back, and trim them to make them look less ragged. Now all I have to do is figure out what I’m going to paint…

h1

New Painting Started: A Distant Stare

August 28, 2016

I think I’ve found something to paint on the new panel I made in the previous post. This was from a short video sequence I had with a woman’s face as she stared intently at another person speaking. She was in the background and the image was small and blurry, so I had to improvise on it some.

distant-stare1

I enlarged the image on a scrap piece of paper, and rubbed some white chalk on the background to transfer the outlines. I like all the line shapes here, and may wind up keeping them in the painting instead of using more modeled shadows in the source image. We’ll see how it goes.

h1

Making a Panel with Acrylic Ground for Pastels

August 26, 2016

Now that I’m between projects, I wanted to use this time to finally test out this Acrylic Ground for Pastels made by Golden that I bought a few months ago. My true plan is to see how well it works with gouache paint.

pastel-ground1

As a test panel, I used a scrap piece of hardboard, 8.5 x 11″. It had a little dried white acrylic paint rubbed into the surface, but I figured that wouldn’t be a problem. First I sized the board with a couple coats of GAC 100 medium to keep anything in the wood from leaching up to the surface. You’ll notice in the photo above that the ground is somewhat gray and translucent. It doesn’t have any pigment in it, like an acrylic “gesso” ground. That gray color is from finely ground silica that gives the surface some tooth for pastels.

pastel-ground2

The label instruction says to not thin it with water more than 40%. This photo shows what it looks like with 3 coats. The first two coats where not very thin, maybe 10-20%. The last coat was thinner. I noticed that the brush left behind a few small gouges in the surface caused by some larger particles of silica, so I dug that out and filled the tiny holes with undiluted ground using a palette knife. I wouldn’t want to do that with a true gesso surface, but with this acrylic medium it isn’t a problem to patch it that way. I suspect that if I had waited for each coat to dry longer and harden, it wouldn’t have had those gouges.

pastel-ground3

I wanted to even out the color a bit, so I mixed up a thin wash of acrylic “gouache.” This will be porous enough for regular gouache paint that won’t lift.

pastel-ground4

The final result I left a bit patchy, but that’s okay. Now comes the fun part of figuring out what to paint on it.