Starting to work on a new painting so I can use some of the paints I’ve been making. This is a portrait of a former coworker named Jason, based on a photo I took of him many years ago. The panel is a tile I made out of Durham’s Water Putty that I written about before. This tile panel is 8×10″, and I’ve coated it with a thin wash of raw umber casein. I made an outline drawing of the photo and rubbed some white chalk on the back so I could transfer that to the panel. Now he’s ready to be painted which I will show in the next post.
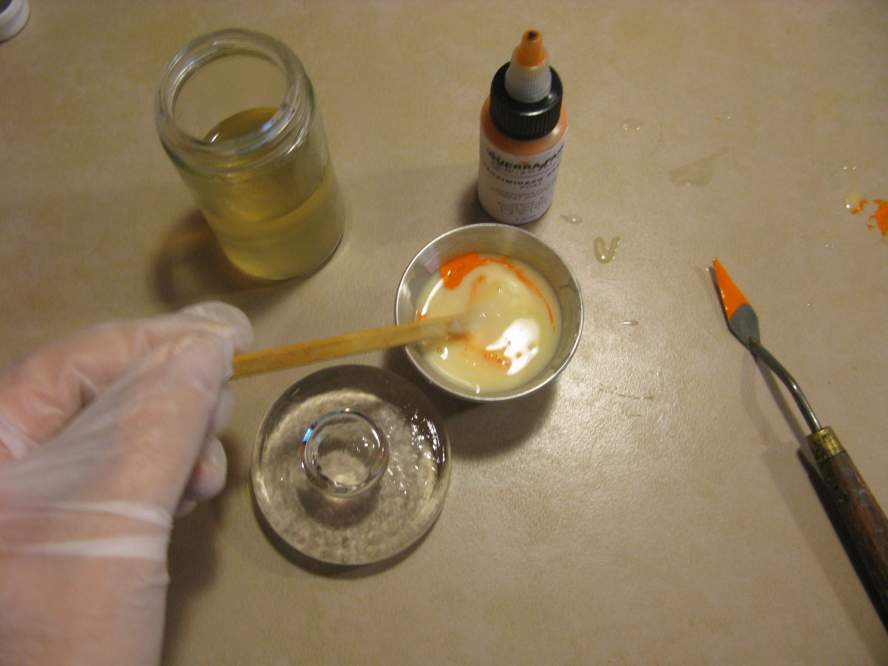
I have another batch of casein paint in process. This time it’s Benzimidazo Orange. I also wanted to show a different method of marketing pigment that is sold as “aqua dispersions.” The squeeze bottle you see above contains the orange pigment that has been dispersed in water. Different companies that sell pigment offer this option. There is a surfactant added as well to make the pigment not repel water and disperse properly, but they don’t mention what that is, possibly ox gall. Dispersions make the handling of pigment much less messy than when it is sold in powder form, but can be a little more expensive. I got this 1 ounce bottle from Guerra in New York. They have a good range of pigments in both dry and dispersions; although, their shipping cost is high.
In the picture above I’ve squirted some of the pigment into the metal jar, and added twice as much casein binder that I’m starting to mix in. The aqua dispersion has a soupy viscosity, and the binder makes it a little thicker, about like wood glue in consistency.
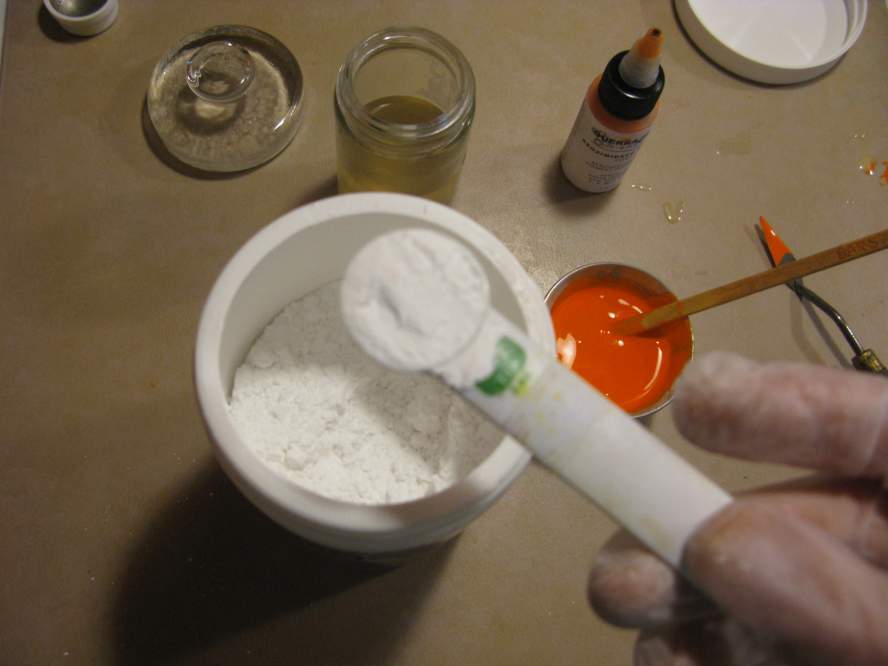
In order to bulk up the paint a little bit more, I decided to add a teaspoon of calcium carbonate as a filler. This amount will not effect the opacity level of the pigment any.
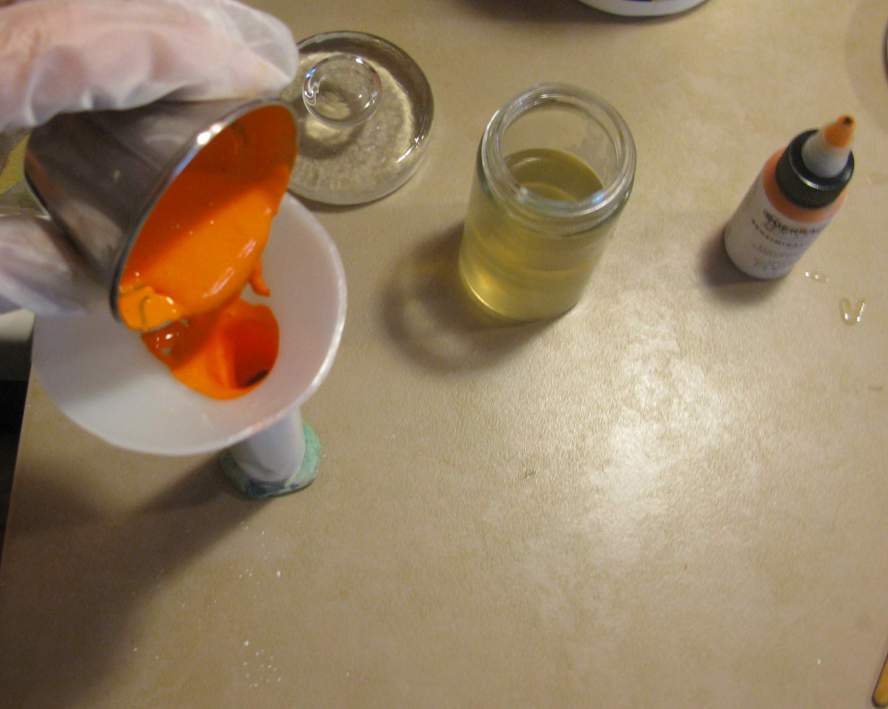
This mixes so smoothly in the jar that I don’t feel a need to do any work on the tile slab at all, so no mulling will be required. Instead after several minutes of stirring it all together I pour the paint from the jar directly into an open empty tube. I like to take a small amount of putty that I press the top of the tube into to hold it upright as I add paint.
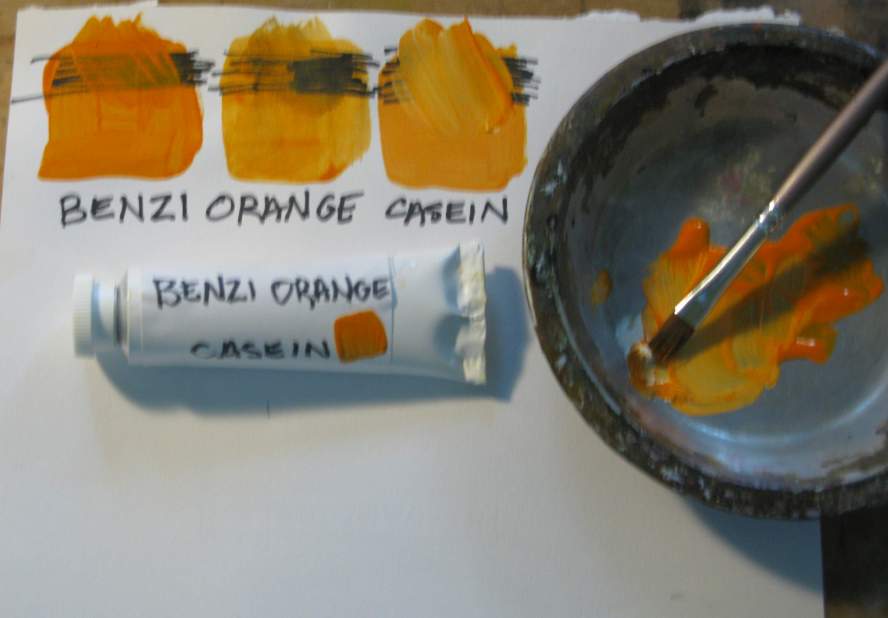
Here’s the finished product of a tubed paint with label applied and some sample swatches. This will probably be the last batch of paint I’ll make up for awhile. Now it’s time to start using them.
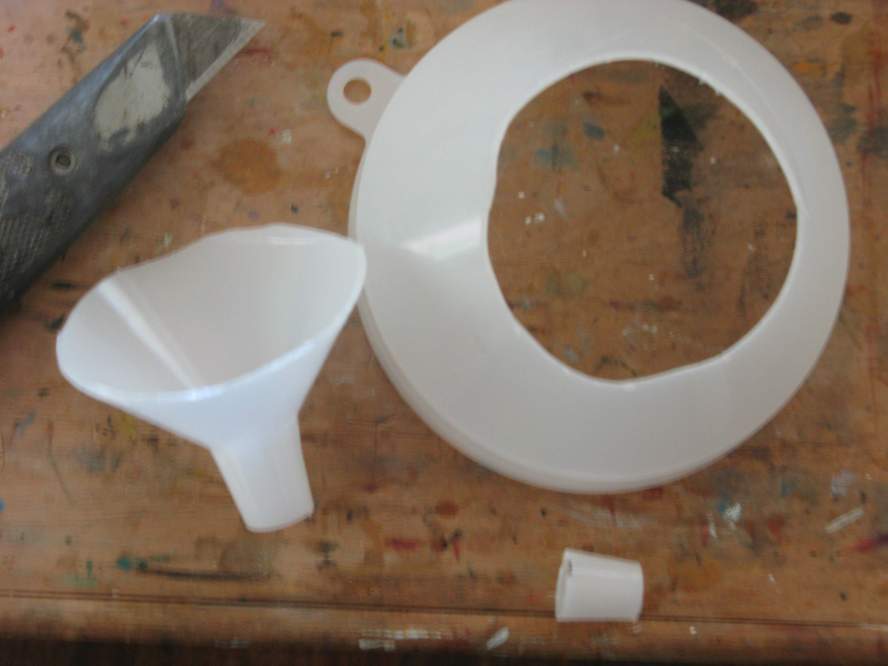
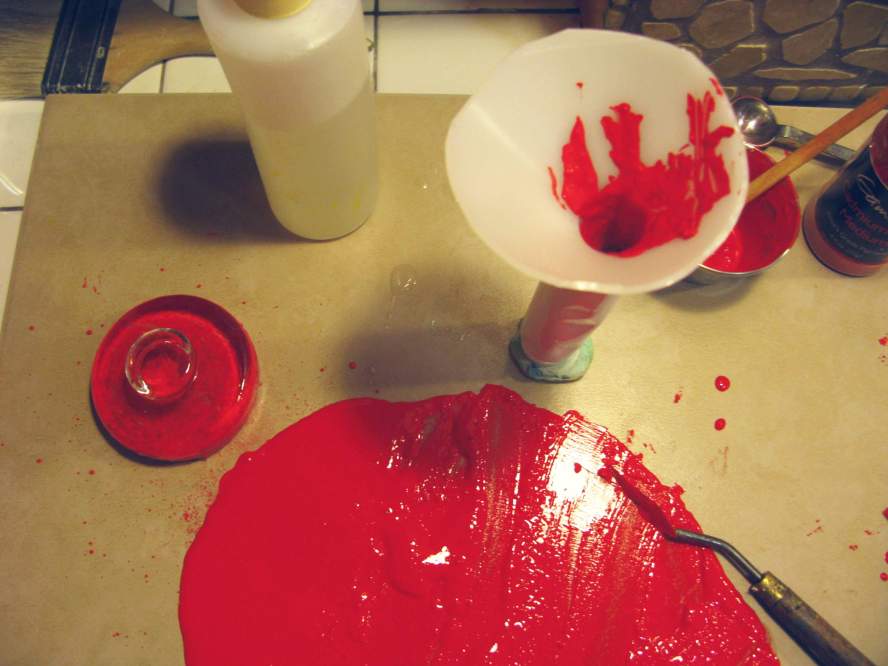
Back to making more paint, this time it’s Cadmium Red (medium shade.) I also wanted to test out an idea for filling my empty paint tubes using a funnel. I bought this large funnel at a local auto parts store, and trimmed off the top a bit to make it easier to fill, and cut off some of the bottom that would go inside the tube.
Now I started mulling up some cadmium red paint, and used the funnel to fill the tube. It seems to work well, making less of a mess than before, and easier to clean. I load the paint into the opening, and gently tap the tube down so it flows to the bottom.
Here’s the final result of a filled tube, all crimped and sealed and ready to use.
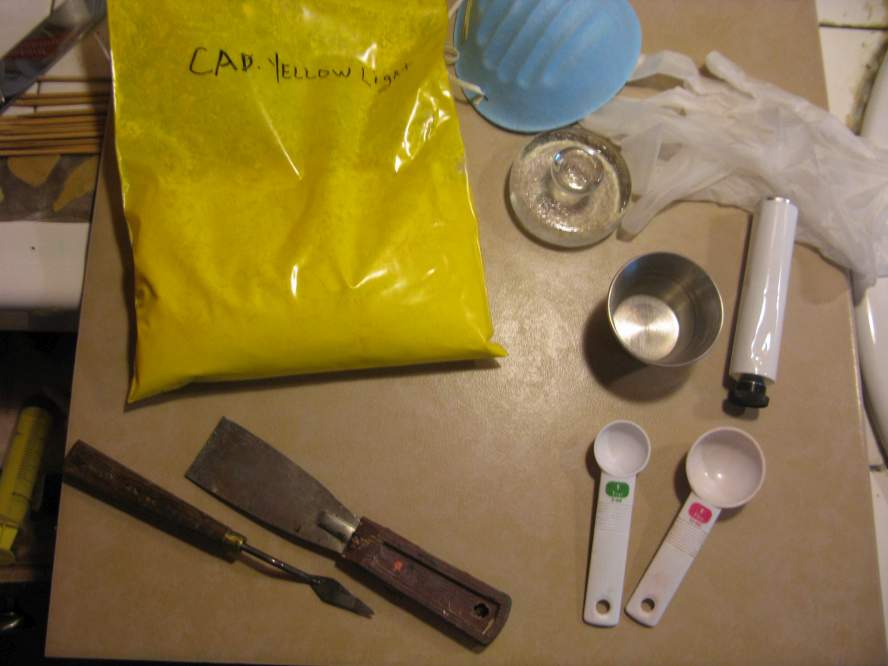
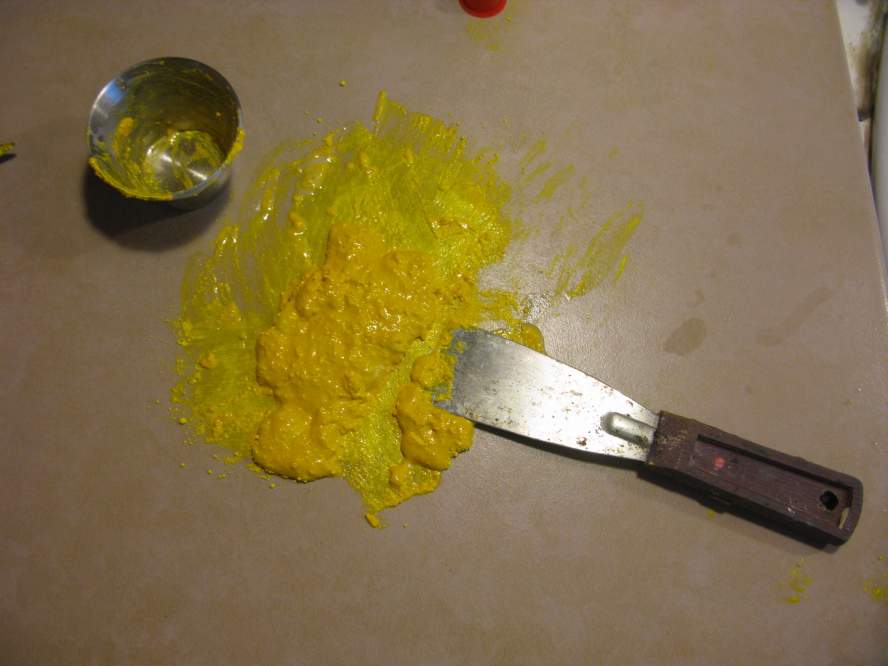
One of the “features” of the paint rack I made recently is being able to see at a glance what paints I have, and which ones are low or missing, at least for the gouache and casein paints that I was able to hang there. It became apparent that I needed a few more caseins, so here I am making a new batch of Cadmium Yellow (light shade.) The picture above shows a few of the materials I use to get started.
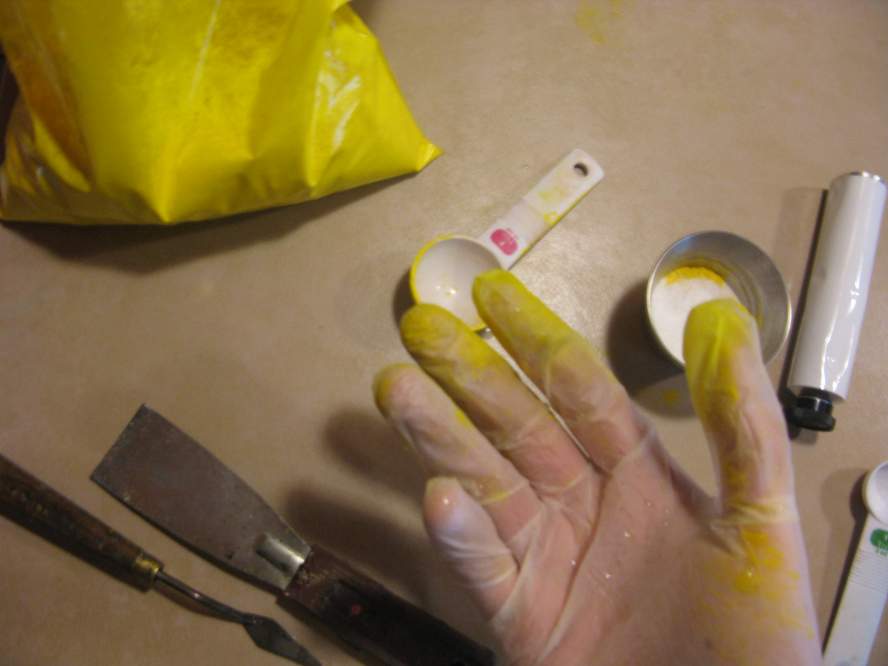
I can’t stress enough how important it is to wear gloves and a mask when handling pigments, especially cadmiums. It’s not really something to be scared of, you just have to be careful. You don’t want to breathe in any of these tiny particles. Even being extra careful, I easily get some pigment on my hands, as you can see. I like to mix the powder first in a small container, like the metal jar here, to which I add my liquids. This helps keep the pigment from flying into the air.
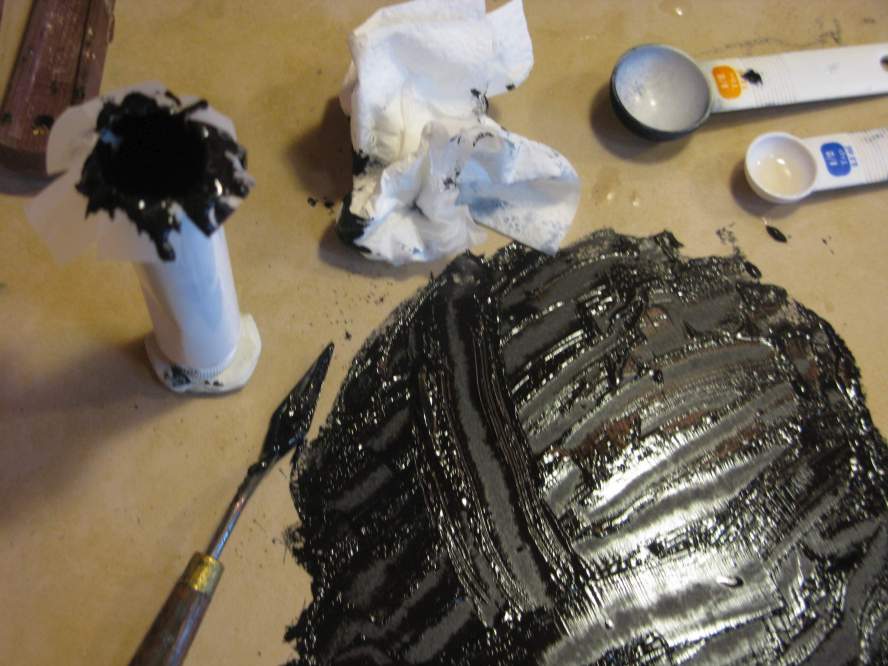
I dump the mixed paint (pigment and casein medium) from the jar onto my grinding tile, and start to mull the paint. This particular batch of cadmium yellow is quite lumpy, so it takes a bit longer to mull than some pigments do. Sometimes no mulling is required at all; I just have to use a spatula to mix the paint and medium. To help with the mulling and to make the paint looser, I added a little bit of glycerin. For this particular batch the ingredient ratio is 2 parts pigment, 4 parts medium, and 1 part glycerin.
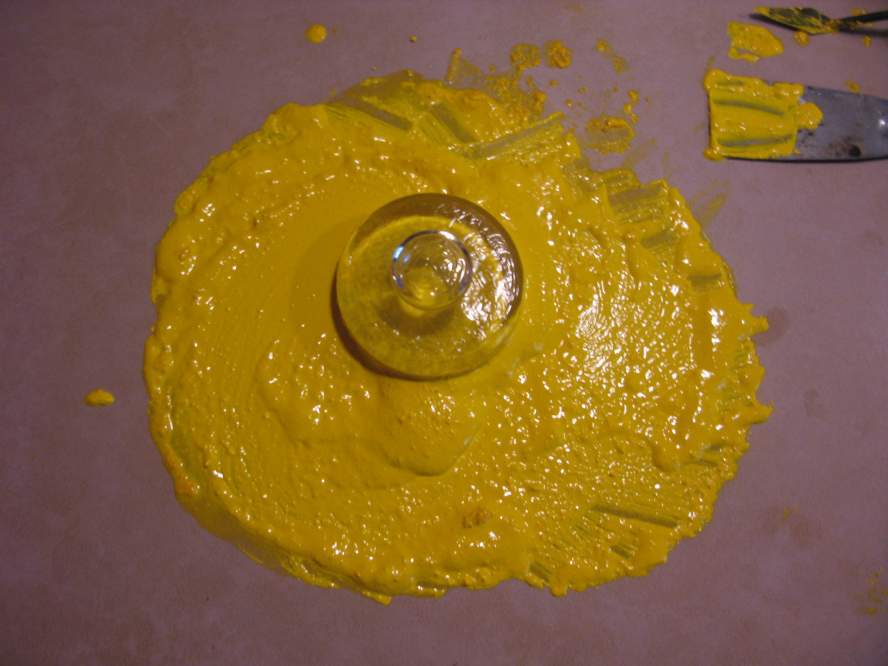
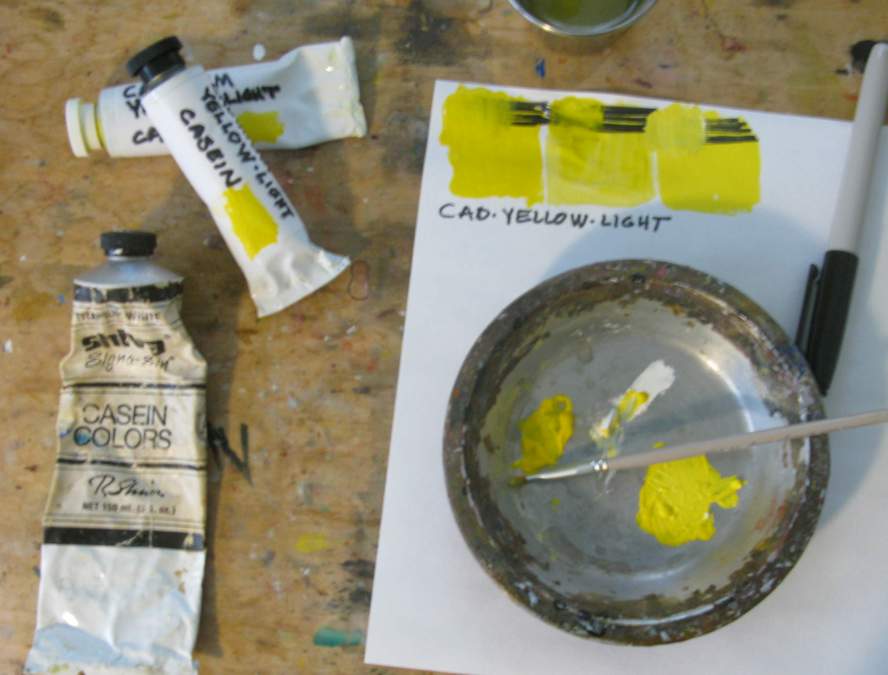
After a few minutes of mulling, the paint is smooth enough to scrape into a tube. These tubes are 45ml in size, and I used about 2 tablespoons of pigment to fill approximately one and a half tubes, one tablespoon at a time with the ratio above. I crimped the bottoms of each tube with a pair of needle-nose pliers, and made up some labels. The paint swatch above shows full strength paint, diluted paint, and yellow mixed with titanium white. I also used an ink marker to test the opacity. Now I have plenty of yellow to add to my collection of paints. By the way, you can see how I make the casein medium in the articles section of my website: LINK HERE.
I’ve found it difficult to write on the paint tubes I’ve been filling, so I wanted to try and make up some labels that I could glue on the tubes. My first attempt was on the Phthalo Green tube. I figured out the size of the label (3.5 x 2.5″) and where the write on it, but after writing the name and then spraying the back of the paper with Krylon All-Purpose Spray Adhesive the solvent in the adhesive caused the ink to smear. So I needed to figure out a way to write on the paper after spraying the back. To do this I used wax paper which the adhesive would not stick to. I sprayed the back, placed it on wax paper, and then wrote the name. The result can been seen on the Indigo Blue label which did not smear, and looks much better. A paint swatch also sticks better on the paper than on the tube.
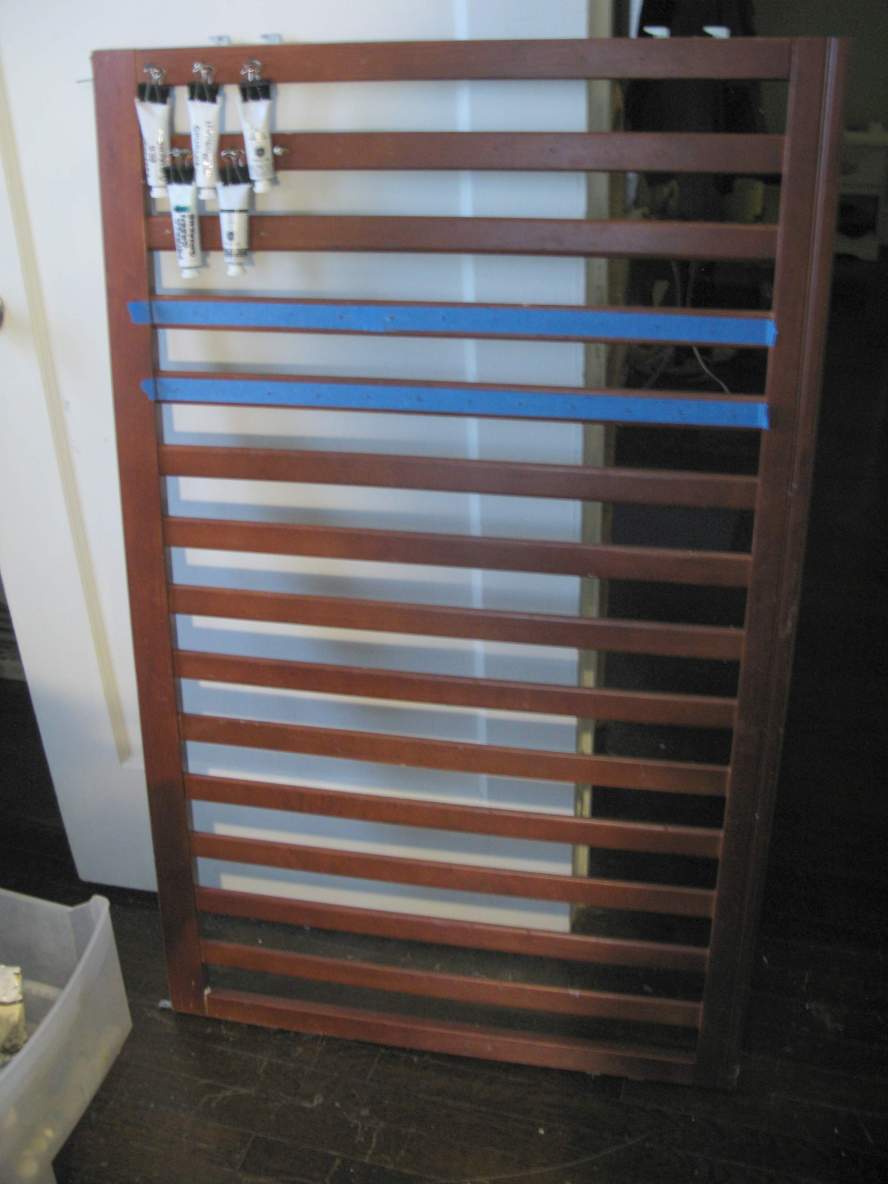
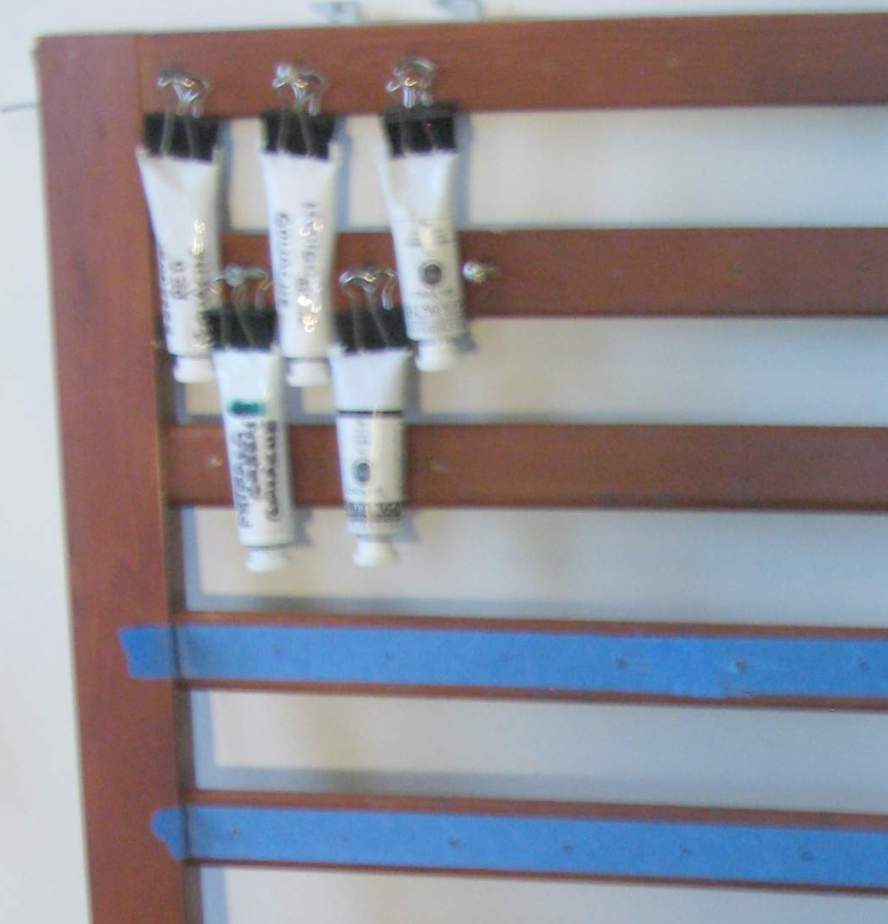
With the paints I’ve been tubing lately, and all the older purchased paints I have, I thought it would be good to come up with a better way to display them, so I started looking online for storage ideas. I came across one method that had binder clips holding the tubes mounted from long nails on a sheet of plywood. Looked simple enough, and I already had a bunch of these clips on hand, so I started digging around the garage for some scrap wood, when I spotted this wood frame in the corner. I had discovered this up in the attic awhile back, left behind by a previous owner I guess. It looks like it was once part of a baby’s crib. I figured it could be used for this display rack idea.
I grabbed a handful of long screws I had, @1.75″, and used some painter’s tape to mark off the spacing I needed for the screws. I then moved each strip of tape as a guide across each rail to keep the spacing uniform and properly offset. Each rail holds 11 or 12 screws. I might swap some longer dowels or 3″ bolts for the screws at some point later, so I can hang more than one color. on them. I could mount this whole rack to the wall, but I think I’ll just lean it up instead so I can move it around if needed. Looks like it’ll work out fine. I just need to buy a box or two of screws.
Following my success with using my own gouache medium to make paint as shown in my previous post, I wanted to try a couple brands of commercial pre-made mediums that I ordered online. I bought a bottle of Rublev “Watercolor Medium” and Schmincke “Gouache Binder”.
I used some Phthalo green pigment to mix with the Schmincke medium, and I used the Rublev medium with some red Pozzuoli pigment that I purchased recently to make some gouache paint.
Both of these brands were easy to use, and quite similar to my own gouache medium that I made from raw gum Arabic powder and a little dextrin. They both had what seemed like the same level of viscosity and appearance. In the swatches above you can see the full masstone of the tubed paint, a diluted sample, and a mix with titanium white. The Schmincke medium is a little more expensive than the Rublev for approximately the same volume, and I ordered my bottle of Schmincke from Jackson’s art supply in the UK, which took awhile longer to arrive but they had the best price.
Overall, the results are equal between my own medium, and either of these two commercial brands. It’s much less expensive to make my own medium, but certainly more time consuming and not as convenient.
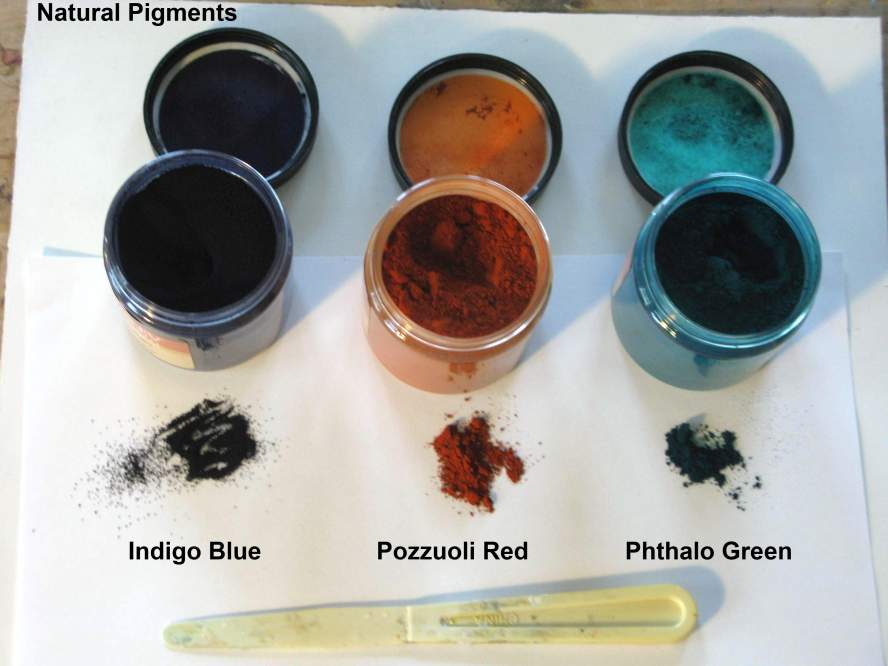
Yesterday I decided to make up some more gouache paint from some pigments I had recently ordered from a couple of different online stores. I’m still waiting to get a few from a place in the UK, but these three I got from Natural Pigments. I’ve made the phthalo green before many times, but the Pozzuoli and Indigo are new to me.
I’ve started on the Indigo first. I’ve read conflicting information about this pigment with some sources listing it as very lightfast, and others saying it is light fugitive. I’ll be doing my own lightfast tests to satisfy myself on that point later, but I decided to give it a try anyway. It mixes up very easily, and it appears to be a highly staining pigment. I like the color, which reminds me of what is usually sold as “Payne’s Grey” commercially, often a mixture of phthalo blue and a black, but here is a single pigment.
I use an empty paint tube to save the paint I mull. The bottom inside edge of these tubes have a sticky film to help close the tube, but it can get covered up with paint, so I protect that somewhat with pieces of cellophane tape. These pigment jars from Natural Pigments hold about 3.5 ounces of pigment, and I figure I used about 1 ounce here. Just to emphasize the paint making benefits: I can make about 4 tubes of paint from this $10 jar, and I’m choosing a paint color that isn’t available commercially. Rhe amount spent on the binder is just pennies, or there are some companies like Da Vinci, Schmincke, or Sennelier that sell the binder premade. I strongly encourage people to experience making their own paint. It’s a little time consuming (this took about 2 hours from set up to clean up,) but very much worth the effort.
This is the finished product in a 37 ounce tube ready to use. I’ve make a couple test swatches, and will put one in a south-facing window for awhile to test its lightfastness. I’ll use this occasionally, in the meantime, for studies and sketches.
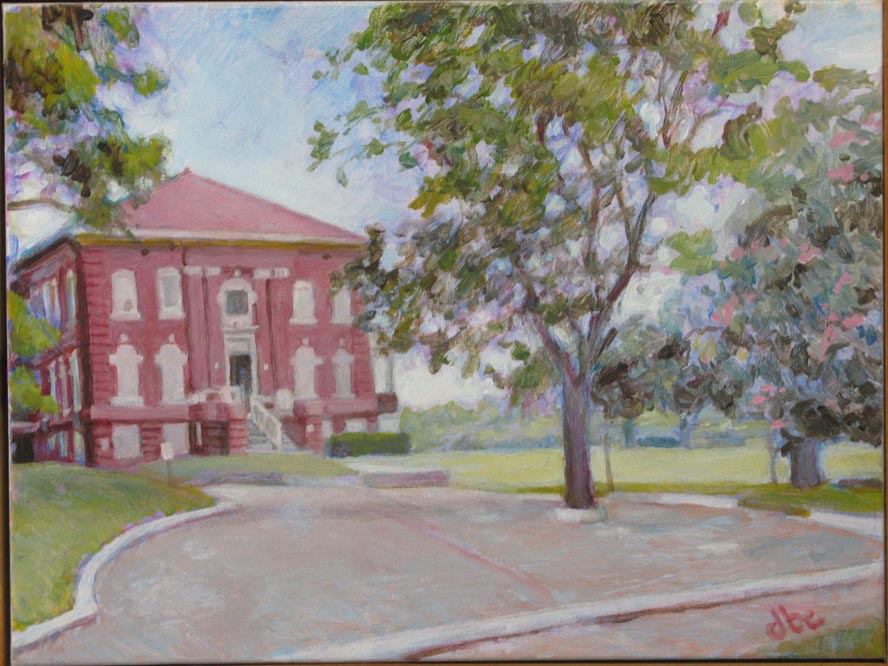
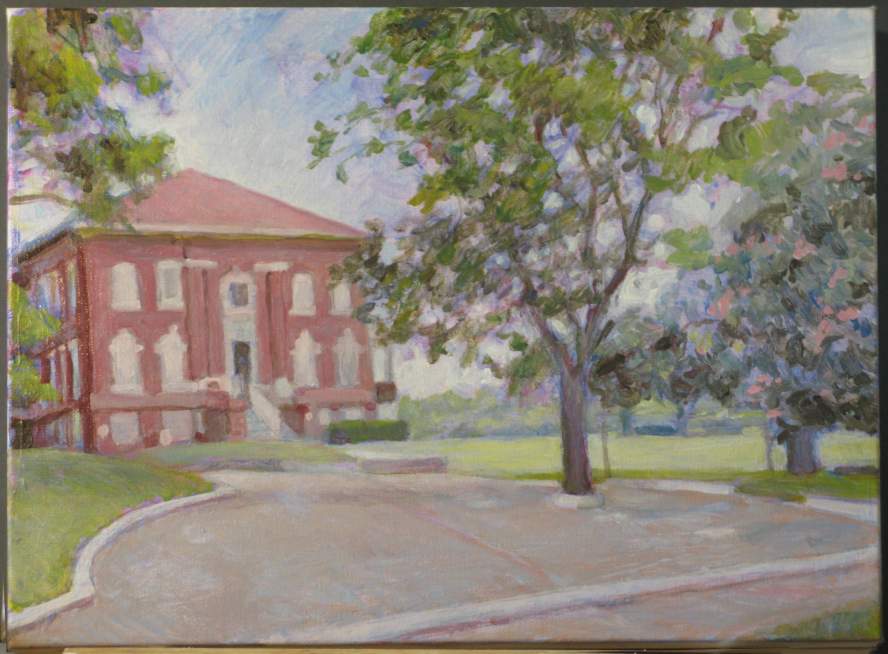
Here’s the final state of the new painting. I made a few adjustments, mainly to the building. I figure all the details should be there to be true to the actual location, but tried to keep things loose to match the surroundings. I’ll be dropping this off for the exhibit today, and will follow up on the show details if it gets accepted.
Starting a new painting. This is a view of a local hospital that will be made in acrylic paint on a 12×16″ gallery wrapped canvas. It is intended for entry into an upcoming juried show with a deadline for entry at the end of the week, so I’ve got to get busy. I’m starting here with an undertone range of blues, and will be adding warmer tones later.
The media is Golden’s Open Acrylics, and I needed a few more colors to expand my palette choices. I ordered seven more tubes from Michael’s online (by way of Dick Blick,) and they just arrived today. Not too crazy about the packaging. Just tossed the paint and thinner bottle loose in a padded envelope, but it looks like it survived the trip okay.
I’ve also been looking at some Impressionist style art to get me in the mood for how I envision this piece to evolve. Mainly looking at Cezanne, like the one above, but also some Gauguin landscapes. Cezanne reportedly referred to his painting method as “little bricks.”
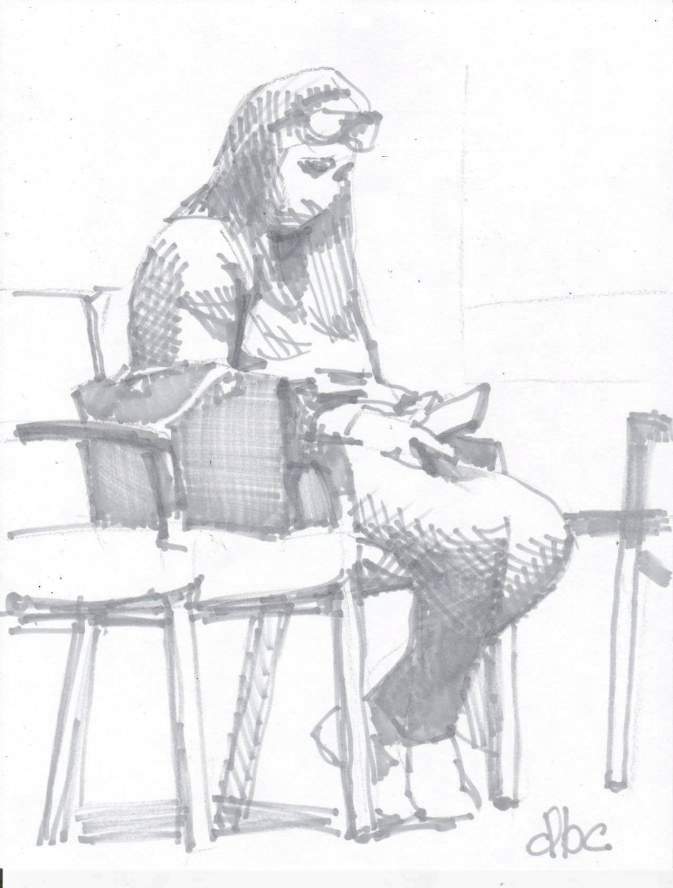
Here are a few more sketches I made at the doctor’s office with people checking their phones. These were made with a Prismacolor layout marker on 8×11″ copy paper.